When I was pretty young I can remember that my Granny Sikes made biscuits every day, twice a day. Biscuits were for breakfast, but also for dinner. Cornbread and cornbread muffins were for lunch. She very patiently showed me how to make them and I remember watching her hands so deftly work the dough and it seemed mere seconds before she had a pan of biscuits in the oven making her home smell delicious! Before Dad retired he made the biscuit-making journey, too. He didn’t have the internet to consult, but he talked to the people he knew made tasty biscuits. His cousin, Jean Quinn, was his first consult and he followed her recipe until he passed away.
Biscuits seemed to be the thing I could NEVER get the hang of. Staying home during the Covid-19 pandemic allowed time to try this delicious breakfast staple yet again. This time I finally discovered the true secret of fluffy, tasty biscuits.
The things I thought made the most difference, like expensive specialty flour, didn’t make that much difference after all. I bought a bag of store brand self-rising flour (because I didn’t want to practice with expensive flour) and watched a few “how to” videos. My first try wasn’t pretty but they tasted fine, but they were flat and a little tough. I learned that this was from overworking the dough and from not having enough fat (butter or shortening) in the recipe.
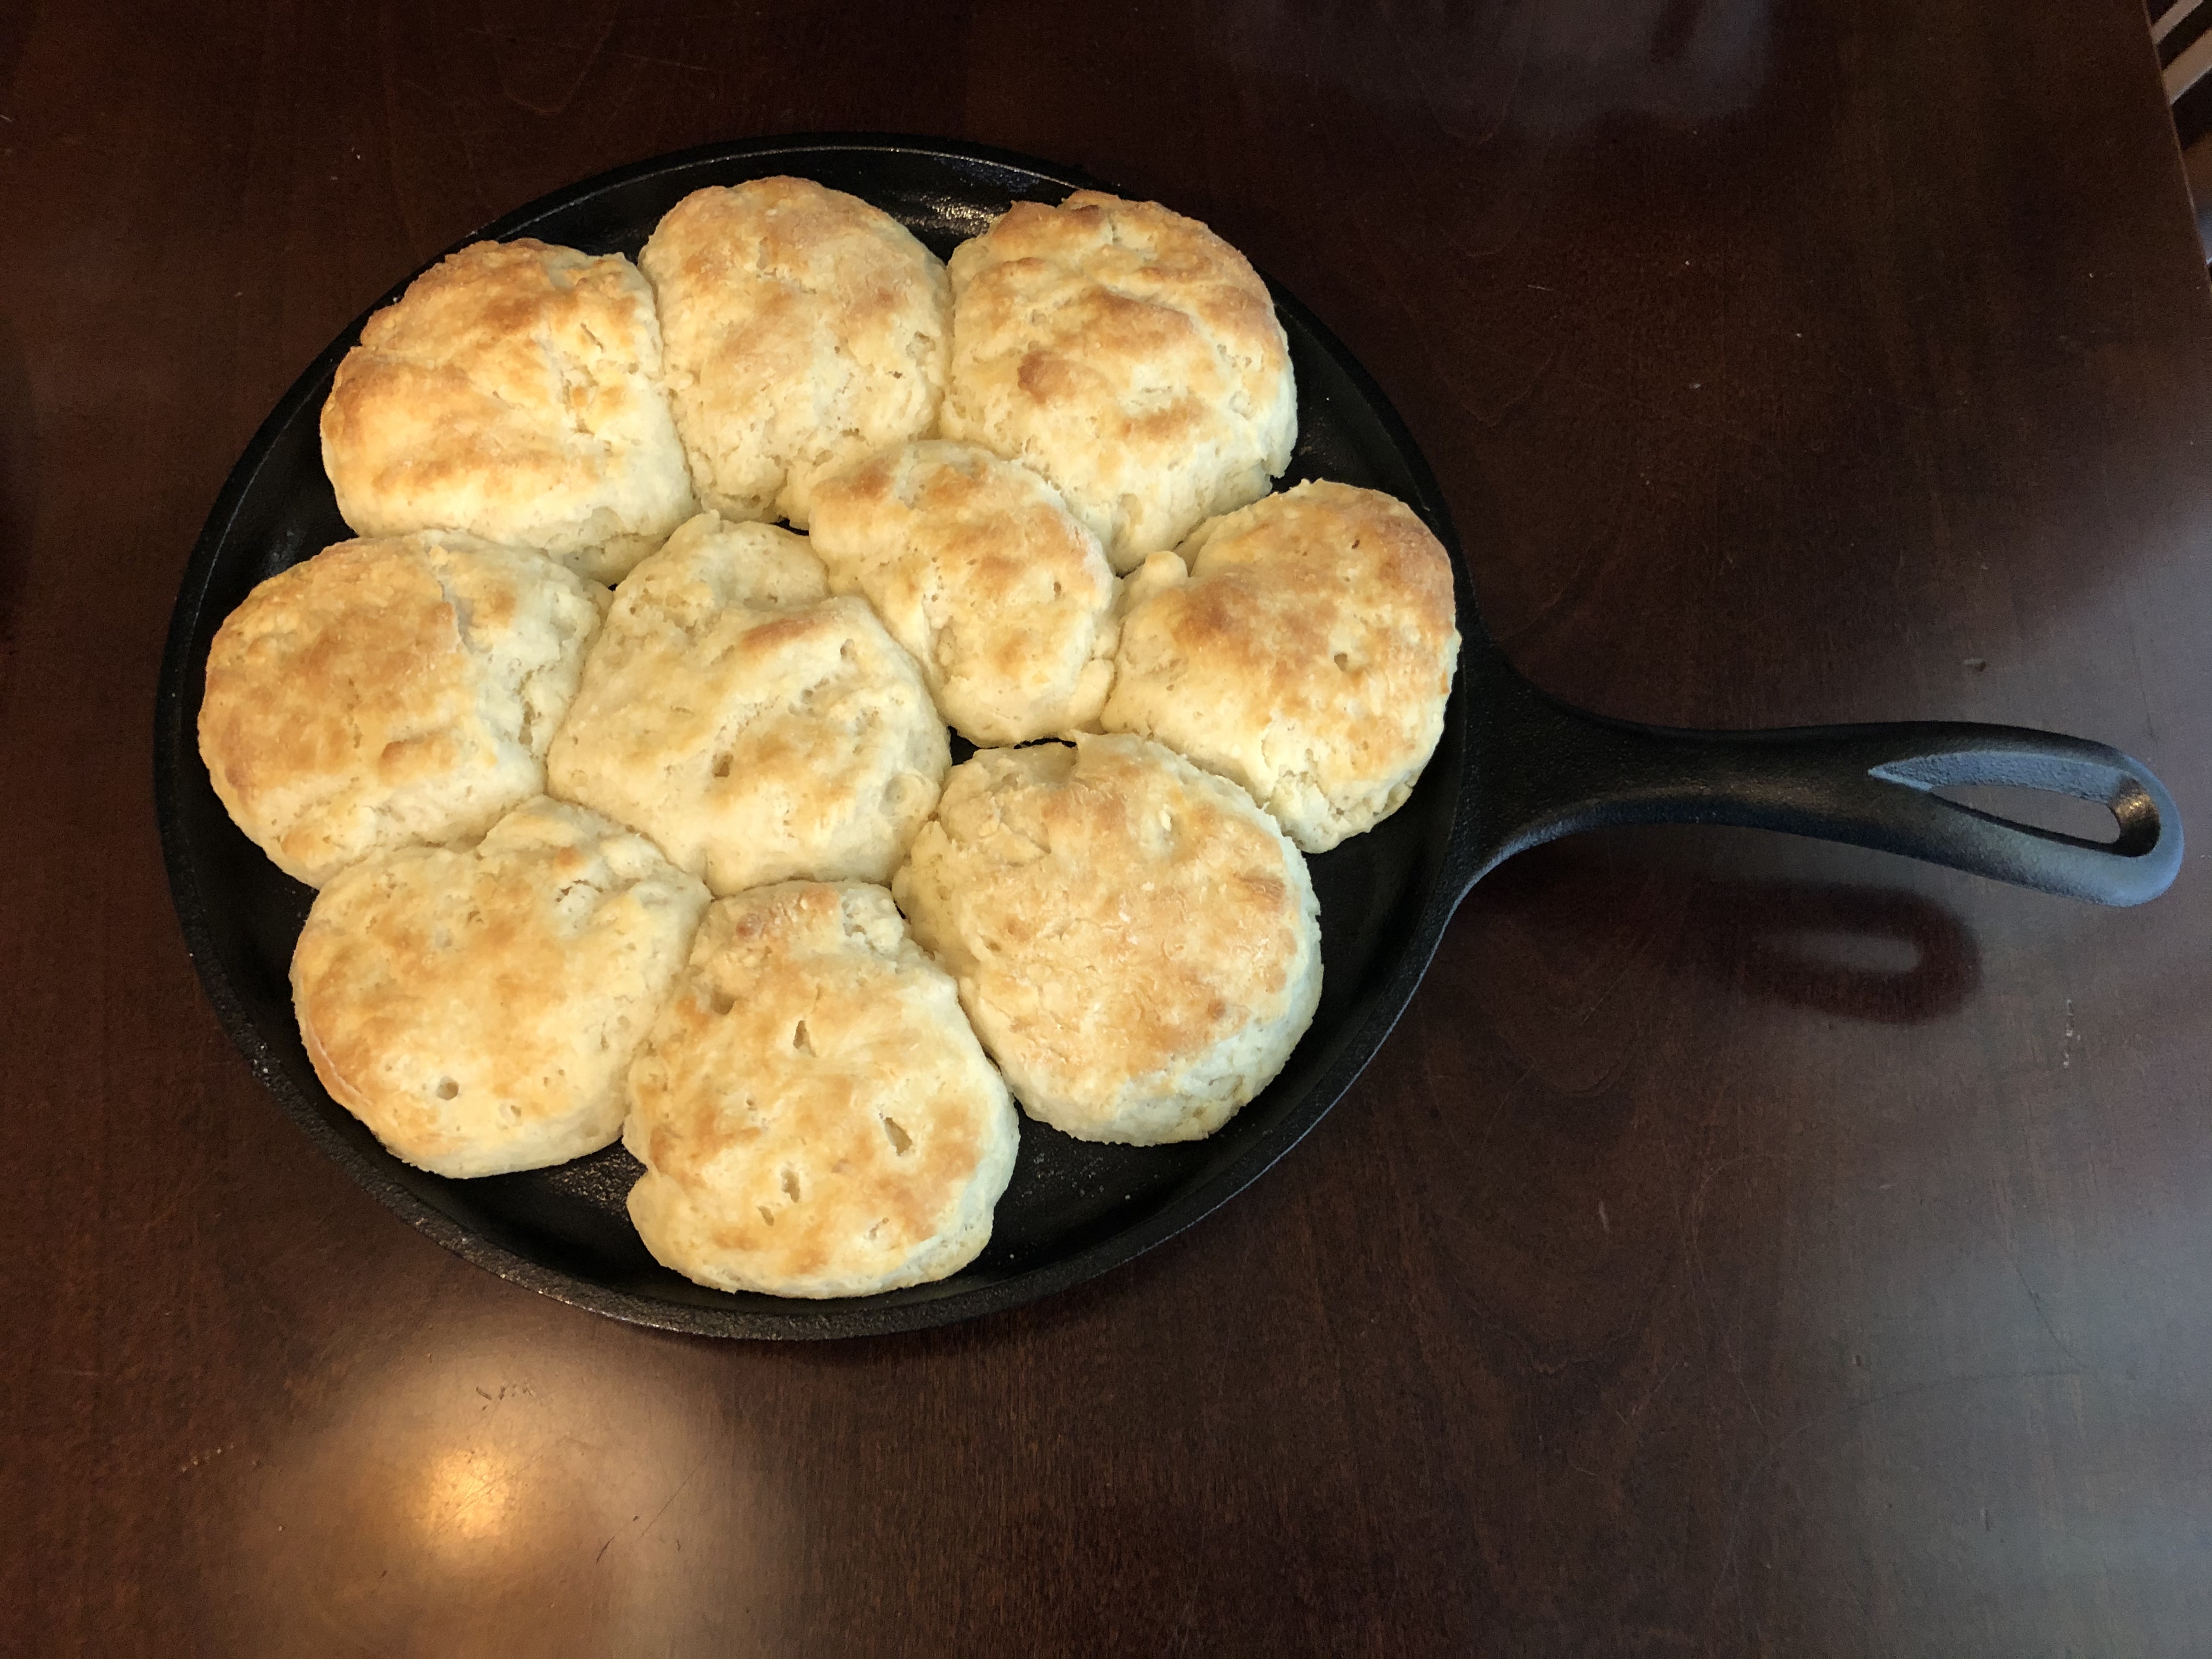
My second attempt produced a fluffier product but they were still flat and not at all like what I remember from the fantastic biscuits Granny, Dad, and Jean made. I watched more videos and bought a Lodge 10-inch griddle – the kind with a handle to make it easy to put it in and remove it from the oven – and tried once more.
SUCCESS! Here’s the final recipe. These are husband approved and I’ve included a picture of my new pan – freshly seasoned and super successful the first time I baked on it.
Old Fashioned Biscuits
Ingredients:
2 cups self-rising flour
1 stick butter (I used unsalted but use salted if that’s what you like.)
1 cup buttermilk
Directions:
1. Preheat oven to 475° F.
2. Rub a small amount of vegetable oil on your griddle.
3. Measure 2 cups of self-rising flour into a medium to large bowl.
4. Cut 1 stick (1/2 cup) of butter into the flour. I used a pastry tool just for cutting fats into flour but the old-fashioned way of cutting it in with a knife or knives will also work. The tool is just faster. I used the butter right out of the refrigerator.
5. Make a well in the middle of the flour/butter mix and pour in 1 cup of buttermilk.
6. I tried stirring the buttermilk in with a fork but soon gave up and worked the dough with my hand – just enough that it released from the sides of the bowl. It was still pretty sticky.
7. Flour your board (I just used the very clean counter top) and drop the sticky dough down in the middle of the flour. I turned it over once to get flour on both sides and then sprinkled the top with just a little flour then pressed it out very gently until it was about 3/4 – inch thick.
8. I had been told that I needed a biscuit cutter that was open on both ends but I used an 8-ounce Tupperware plastic cup that was just the right diameter, cut out the biscuits and gently placed them on the griddle with sides barely touching. I learned from earlier attempts that if they are not touching, they will not rise as much.
9. Place in the preheated oven and bake for 13 minutes.
Note: My oven seems to be “cooler” than most recipes require so I add 25° to every baking temperature. You may want to back off to 450° if your oven temperatures are accurate.
I would love to hear your stories about your biscuit-baking and even see your recipes as comments on this page.

Nice job! I grew up on made from scratch biscuits as well and have plans to try my hand at some after my next grocery trip. 🙂
LikeLike
Thank you for being the first to comment on my new site! I hope you have as much joy in your journey toward made from scratch biscuits as I did! Please come back and share how it turns out!
LikeLiked by 1 person